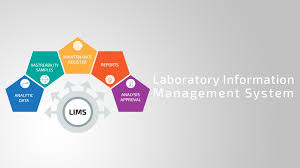
In a pharmaceutical company, it’s not enough for a system to just “work.” People actually expect proof that it works properly every single time, especially when audits or inspections are involved. That’s exactly why LIMS validation becomes so important.
If you’ve ever been part of a validation project, you’ll relate to this—it’s not just about creating documents and getting signatures. It’s a step-by-step process where each stage builds confidence in the system. From writing the requirements to checking how the system performs in real lab conditions, everything needs attention.
In this blog, I’ll walk you through the complete LIMS validation approach—from URS to PQ—in a simple and practical way, based on how it’s usually handled in real pharma projects
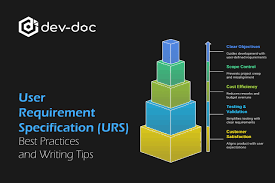
Step 1: User Requirement Specification (URS)
Every validation starts with clarity.
URS (User Requirement Specification) defines what users actually need from the LIMS. This document is usually prepared by business users, QA, and IT together.
A good URS should be:
- Clear and testable
- Aligned with GMP processes
- Focused on business needs, not technical jargon
Step 2: Functional Specification (FS) & Design Specification (DS)
Once URS is approved, the system design begins.
- FS (Functional Specification): Explains how each requirement will be fulfilled
- DS (Design Specification): Covers technical design, workflows, database structure
At this stage:
- LIMS workflows are configured
- Roles and permissions are defined
- Integration needs are identified
A strong FS/DS ensures smooth testing in later phases.
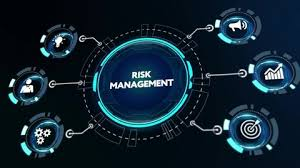
Step 3: Risk Assessment (RA)
Not all functions carry the same level of risk.
A risk-based validation approach helps prioritize testing efforts. Critical functions like:
- Data entry
- Calculations
- Audit trails
- Electronic signatures
are given higher priority.
Common methods used:
- FMEA (Failure Mode and Effects Analysis)
- Risk ranking (High/Medium/Low)
Step 4: Installation Qualification (IQ)
Now comes the first level of testing.
IQ (Installation Qualification) verifies that:
- LIMS is installed correctly
- Environment is properly configured
- Required software and hardware are in place
Typical checks include:
- Server configuration
- Database setup
- Version verification
Step 5: Operational Qualification (OQ)
OQ is where the system starts getting tested in detail.
OQ (Operational Qualification) ensures that:
- All functions work as per design
- System behaves correctly under different conditions
This includes:
- Test scripts execution
- Negative and positive testing
- Security and access control checks
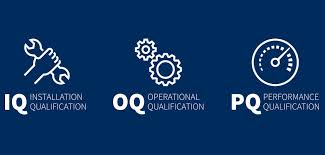
Step 6: Performance Qualification (PQ)
Finally, we test the system in a real-world scenario.
PQ (Performance Qualification) verifies that:
- LIMS performs effectively in actual lab operations
- End users can use the system smoothly
- Business processes are supported end-to-end
This involves:
- Real sample workflows
- User acceptance testing (UAT)
- Routine scenario execution
Key Challenges in LIMS Validation (Real Talk)
In real projects, things don’t always go perfectly. Some common challenges include:
- Poorly defined URS
- Frequent requirement changes
- Incomplete test cases
- Lack of user involvement
- Time pressure during validation
Best Practices for Successful LIMS Validation

From practical experience, here are some tips that actually work:
- Keep documentation simple and clear
- Involve QA from the beginning
- Follow a risk-based approach
- Ensure proper training for users
- Maintain complete audit trails
- Never rush PQ phase